Have you ever been in a plane or driving over a mountain and you feel your ears sort of pop? This is actually caused by the change in altitude, which causes your ears to equalize due to the change in pressure as well.
This is the same reason why when you dive to the bottom of a pool, for example, you may start to feel a little pressure in your ears. And if you go too deep, it will even start to hurt. But when you’re scuba diving, you’ll go even deeper. And it just means that the risk of causing pain or even permanent damage increases significantly.
Hi my name is Jonathan From Private Dive Service. In this blog, I’ll teach you how to avoid ear pain by easily equalizing your ears while scuba diving. Let’s get into it.
Understanding Ear Equalization
Ear equalization is something every diver should learn how to do. At just ten feet, the amount of pressure exerted on the outside of your eardrum is four and a half psi, or pounds per square inch. Now, that might not sound like much, but it’s enough to pop your eardrums.
This will mean that a sudden rush of cold water will enter your middle ear, which can cause dizziness, pain, and also permanent hearing loss. This is why we need to equalize our ears early and often using one of these techniques.
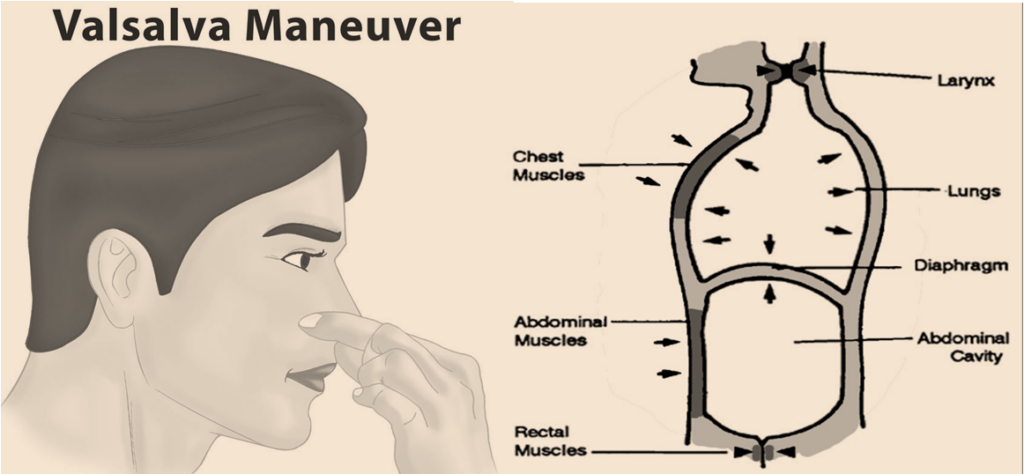
The Valsalva Maneuver
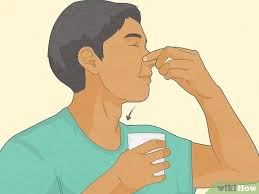
First, the Valsalva maneuver. Now the Valsalva maneuver is probably the most common that divers learn. To do this, you will need to pinch your nose and then blow very lightly through your nose because you are pinching it.
Air is trapped and this will help clear your eustachian tubes for you. It does this by pushing the air this way. It’s not actually muscle relaxation or anything like that. So if you already have blocked pipes, this may not work for you and you may need to try another of the techniques.
The benefit of this is that it is very easy to do with one hand. You can simply pick the nose through the edge of the mask or if you are using a full face mask you will block the nostrils using the small block that is inside the nose part of the full face mask. And then you can blow lightly through your nose, which again cleans your ears for you.
Involuntary Opening of the Tubes
Now, while Valsalva is great and again, it is probably the most basic and common that divers learn. There are other techniques you’ll want to learn as well because, again, if the tubes are open because they’re already blocked, the Valsalva won’t work for you, because there’s nowhere for the air to go. even in your eustachian tubes. Here comes the other method in voluntary opening of the tubes.
How to Do It
Now, to do this, you’re going to strain your throat up a little and then push your jaw forward and down, which will actually elongate your neck a little and open up your Eustachian tubes for you, allowing you to have a continuation. airflow or essentially a continuous draw.
Now, this is something that is really hard to learn and takes a lot of practice, but divers who understand this are able to do it and basically never have to equalize by hand, because they just always leaving those tubes open forcing them to stay open because of that maneuver with their mouth and throat.
The Toynbee Maneuver
Next up will be the Toynbee Maneuver. The Toynbee maneuver is very simple and is similar to Valsalva, but instead of pinching your nose and blowing, you’ll hold your nose and swallow instead. And that swallowing motion will again help push some air up as well as open those tubes up a bit as you work that swallow through your throat muscles.
So this is really similar. Again, if you’ve been on a plane or gone over a mountain, maybe if you’ve chewed gum before and swallowing and moving your mouth and jaw will actually open up your tubes, which allows your ears to equalize. And similar to that. Toynbee says you can blow your nose and swallow, and this will help get air out of your pipes to help clear it.
The Frenzel Maneuver
Next, we have the Frenzel maneuver. The Frenzel maneuver will be very similar to these others, where we pinch the nose. But instead of just pinching our nose and swallowing or pinching our nose and blowing, we’re going to pinch our nose and make a K sound that’s going to be an implosive sound, which means we’re basically blowing the air out with strength. of a fast movement.
And because we pinch our nose when we try to make that k sound that will help push the air through our tubes again, which again allows us to clear our ears.
The Lowry Technique
Next is the Lowry technique. Now, the Lowry technique is basically a combination of Valsalva and Toynbee. So Valsalva, pinching your nose and blowing your nose lately. The Toynbee technique of pinching the nose and swallowing. Well, now we’re going to do both at the same time, basically.
So you are going to put some pressure on both of their noses by blowing a few. As you catch it, you will swallow it at the same time. And it’s basically the combination of the two methods to do the best job of pushing in some extra air, while also trying to open those tubes by pulling the muscles through the swallowing motion.
The Edmonds Technique
The other is the Edmonds technique. The Edmonds technique essentially combines Valsalva with voluntary opening of the tubes. So the Valsalva again is pinching your nose and blowing gently, which allows you to push the ear pressure or the air pressure in the inside of your ears a little bit, which will help you equalize. And the voluntary tubular opening is where you have your mouth closed.
You strain your throat and soft palate. You thrust your jaw forward and down as if you are rejoicing. And this will help open the tubes by pulling the muscles themselves down. So, combining those two, we’re going to pinch your nose, we’re going to blow your nose, while we’re also trying to push your jaw forward and down by getting upset and straining the back of your throat, almost as if we are ready to swallow. And there is a lot to do.

General Tips for Ear Equalization
With the techniques out of the way, let me talk about why you might want to learn more than one of these and just some general tips as well. So first of all, if you have trouble with your ears, you might want to do the descent with your feet first. So going down feet first instead of head first or maybe being horizontal instead just gives your body a little bit of ability to help clear that upward pressure to a little bit higher depth than what you would be if you were upside down.
Another thing you can do that some people claim works, and it’s probably more in their head than anything else, is sometimes to point the ear up that’s causing you problems. So let’s say I can’t clean my left ear. I would like to tilt my head down and have you be a little higher than the other ear.
Another tip you can do is if you actually look up, that helps stretch your neck muscles as well. So looking up like this will help you lengthen your neck and stretch it. And this stretching motion will help open up your tubes as well, which will again help you with the draw.
You can also use an ascent line if possible, if it’s an anchor or mooring line of some kind, or maybe you just have a descent line you’re doing. Maybe it’s a buoy on a training platform, for example, or something along those lines. You can use a descent line to stop your descent in the clear and then simply descend a few hands in the clear. Get off a few hands and clean up. And again, this is so you can draw early and often.
Importance of Equalizing Early and Often
The other thing you can do with an ascent or descent line in this case would be, you know, go ahead and get up a little bit and try to clear again. Maybe you just missed the point where you were supposed to clean. So just going up a little bit will allow you to clean your ears after cleaning, you’ll be fine. You can go in, go down and start sending a clear, clear, etc. discount. And just being able to clean early and often so the deeper you go the easier it is to clean if you’ve done all the cleaning up to that point you won’t have to clean very often. Once you get down deep and on the way up, you don’t have to clean at all.
It’s really just that initial, you know, 10 to 20 feet or really just the first ten feet where the pressure the pressure difference between zero and 30 feet or zero and ten feet is literally double that of the surface. So that’s kind of the critical part that you really need to level up as often as possible. As you continue to go down, you need to draw early and often. It’s also important to point out that this isn’t something you can just brush off, because you’ll be causing yourself a lot more pain. I already mentioned it a little earlier in the video, but just those ten feet or roughly three meters of pressure on your ear is enough to rupture your ear drum. Unless you equalized and cleaned your ears on the way down. So even in a pool, if you’re submerged ten feet down, you have a chance of rupturing your ear drum.
And that’s really good to know because now you know how to clear your ears, even if it’s just the Valsalva, which is, again, the most basic method of pinching the nose and blowing. But it’s not something you can go through if you go through it and you get to a point where you end up having a reverse lock, it’s called, or something like that, where you’re basically missing the clearing point. And then now below you have that air that’s built up as you go up. Now he is trying to escape. Instead, it will hurt like hell and you’ll ask me how I know it’s happened to me once or twice, unfortunately. And it’s not a fun experience. It’s actually happened to me on a plane as well where my ears were a little blocked and weren’t equalizing properly. And oh my gosh, I can tell you now that’s a pain you don’t want to have.
Now, if you’re having trouble, you have to make sure you alert your friend and let them know that something is wrong and you can’t clean their ears or something is wrong. And I can’t clean my ear here. If you can’t clean at all, you may need to end the dive. Being able to communicate this to your buddy is essential to making sure you’re both safe underwater.